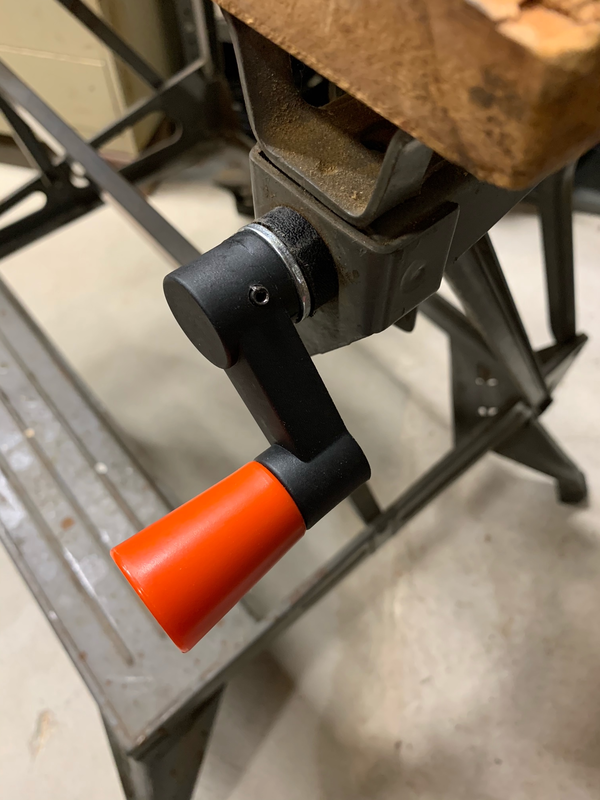
Workmate 79-001 Handle Replacement
In March 1977, plastic crank handle arms replaced the aluminum ones on the 79-001 Type 2, and they were standard from that point forward on all Types 4, 6, 7, 8, and 9. Unfortunately, both the plastic and aluminum arms can be snapped off when subjected to too much force or a sharp impact.
Original parts are not available to replace a broken one, but the handles from newer models can be adapted to fit. (Unfortunately, the new knobs are orange, not the original black.) The following is compiled from descriptions by a couple of different owners about one way to do the repair.
Original parts are not available to replace a broken one, but the handles from newer models can be adapted to fit. (Unfortunately, the new knobs are orange, not the original black.) The following is compiled from descriptions by a couple of different owners about one way to do the repair.
- Purchase a replacement crank arm and knob. You can find these available individually from eReplacementParts.com.
https://www.ereplacementparts.com/crank-arm-p-95679.html
https://www.ereplacementparts.com/knob-p-95613.html
They are also available in a bundle with other parts here:
https://www.ereplacementparts.com/baghardware-p-95677.html - Remove the broken crank handle by punching out the roll pin. Keep the pin. There is a video on YouTube demonstrating this: https://www.youtube.com/watch?v=wYQ6ZlIpTd4
- If your broken handle is the plastic style that was standard on the Type 4, 6, 7, 8, and 9, you'll see that the part of the arm on the new handle that attaches to the threaded rod of the vise is shorter than the original one, leaving a gap between the arm and the frame of the Workmate.
- Since the original arm is longer and has an insert that extends into the frame and helps keep the threaded rod centered, you can take the old/broken crank and cut off the portion of the old crank (about 1/2 inch) with the smaller extension.
- Put the cut off portion of the original crank onto the threaded rod first, add a washer if needed, and then install the new crank and handle, securing it with the original roll pin.
- Here is a video showing the completed job: https://www.youtube.com/watch?v=VOD5rDUfyzo
- If you try this repair method and have success or lack of success to report, let me know through the Contact page.